![]()
ANIMATION USING THE GIMP
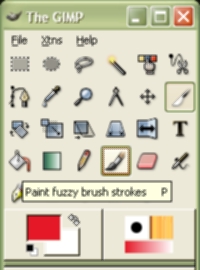
It is possible to created animated Gifs using the Gimp which is located on your toolbars. You should see an icon that resembles this.

Click on it, if you haven't used Gimp previously this will start the installation programme. ( The installer will ask a series of yes no type questions, agree or yes to all and you should have no problem) Otherwise it will open the software. You should see something that resembles this.
Create a new file by selecting file, new. This should give you something that looks like this.

Choose a size by typing it into the height and width boxes, for your first attempt, use 256 x 256.
Make sure that RGB is selected under image type and white is selected under fill type.
Save this image as a gif. This should follow the same basic process you use for your other Gimp work. If you experience trouble follow the following steps.
Placing your curser over the image, right click your mouse.
Then scroll down the resulting menu to reach image.
Move the mouse to the right to mode.
This should bring up three colour options. Click on indexed to get a box that looks like this to open.

Choose the generate optimimum palette option and make sure it is suggesting 256 colours.
Click okay to close the box.
You should now be able to save as a gif. Make sure you name the image with .gif in its name (i.e fredbg1.gif) and check that the "by extension box" on the save menu also says gif.
Having done this, select a background colour using the bucket fill, just as you did for that task. Add clouds or other features then save.
A NOTE ON SAVING: It is a good idea to create a gimp directory, or at least make sure you know where you put your images, most linux software will stick saved files in your root directory, ie /home/fred/ so if you can't find it, type that into the file open box and click okay. Reopening the file open should now take you directly to your root folder. When presented with a save or open window, if you can't immediately see what you are looking for, try clicking on :\ this will take you to your root directory, clicking on folders will allow you to navigate through your pathways to the right folder.
This image which should look something like this, is now your "master" background.

We now need to make a new image, the same size (256 x 256) but this time we select a transparent background. We will use this to make a copy of our first image.
Right click your mouse over the original images, select edit then copy.
Transfer your mouse to the new image, right click again and select edit and paste. You should end up with two images which look identical.
Then, right click on the new image and move down to layers, click anchor layer. Save this file as a gif call it something like anim1.gif. This is now the basis for your animation.
Then using the right mouse button go to the layers menu and select layers, channels and paths. This will open something like this

This box becomes very important. It is the heart of the animation process on gimp. In simplest terms what we are about to create is an electronic flick book. A series of images stacked on top of each other, that when flicked through give the impression of animation.
Click the tab on the bottom left hand corner which will create a new layer. ( looks like a bit of paper with a corner folded down) This creates the second layer. Remember select transparent when it asks you for fill type.
Copy and paste your background into this new frame and draw your first image
Then right click go to layers and anchor this layer. REMEMBER, after each layer has been altered it needs to be anchored to the stack. IF you anchor first, you can't change the image.
You will need to repeat the last steps, creating a new layer, copying the bakcground then drawing a slightly different image for each succeeding layer until you have finished your story. Think of what you are doing in terms of building a stack of duplicate images, each slightly altered which play in sequence.
Then save your work again, this time choosing the export as animation option which is presented in the save box..
What you should have now is an image that looks like your last frame.
Using your web browser (mozilla or opera) select file, open and then select your gif. The web browser you now play it for you as a animation.
Like this one.

You can also view your animation by right clicking on it, scrolling down to filters, then across to animation and clicking on playback, this will open a small viewer. Clicking play will cause the image to animate.